 The Boring Project
How to Add Auto Apply to Job Search App Products
A build guide for product teams shipping an auto apply feature: what the candidate sees, what your backend sends, how webhooks and needs_input work, and how to roll it out safely.
Job search apps are good at discovery and bad at the last mile. Users save roles, get notifications, and then leave to fight with an employer's application form in another tab. Many never finish.
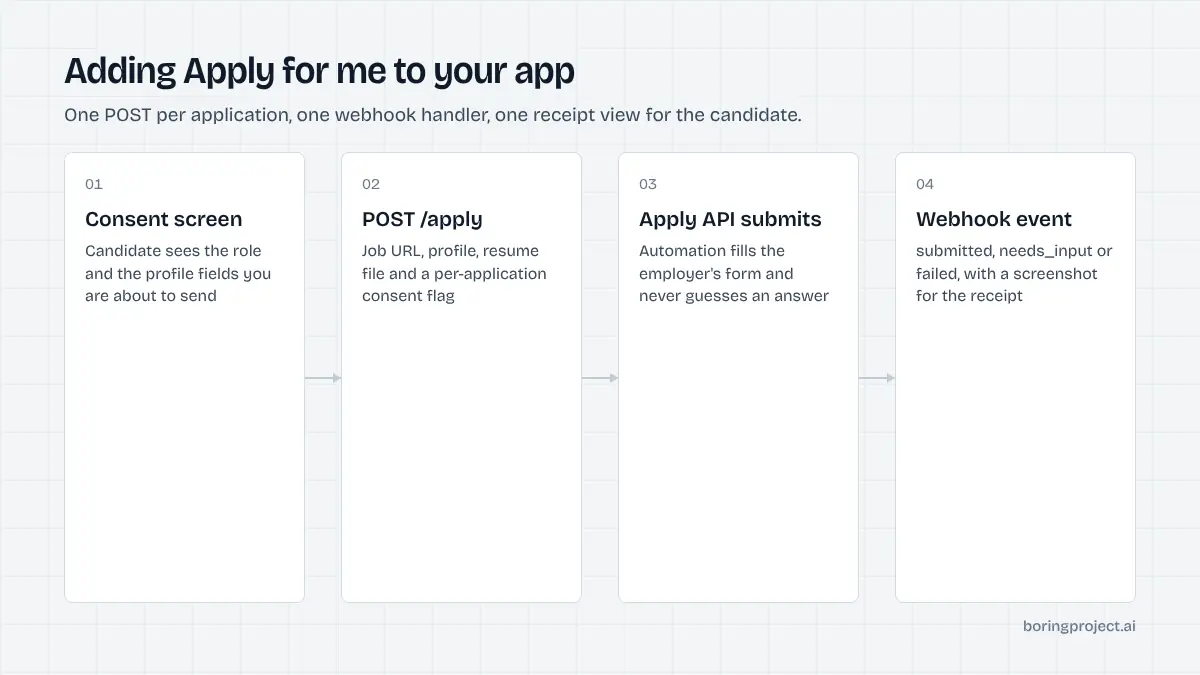
Adding an "Apply for me" button closes that gap. The user approves, your backend sends the job and profile to an apply API, the form gets filled and submitted on the employer's own ATS, and a receipt comes back. This guide covers what it takes to add auto apply to job search app products: the product decisions, the integration work, and how to roll it out without surprising anyone.
Product decisions before you write code
The consent screen
Every automated application needs explicit approval, and the consent screen is where that happens. It should show the job title and employer, summarise which profile fields and which resume will be sent, and offer a clear approve action. If the candidate has multiple resumes, let them pick.
Keep it short but honest. Users who understand what is being sent trust the feature; users who discover later that an old resume went out stop using it. Record the approval with a timestamp and the profile version.
Profile completeness
The single biggest driver of smooth submissions is a complete profile. Employer forms routinely ask for work authorisation, start date availability, location and willingness to relocate, salary expectations, and a handful of role-specific questions. Each field missing from the profile is a potential pause.
Audit the forms on your most common ATSs and add the standard fields to your profile model before launch. A short "complete your apply profile" flow, prompted before the first automated application, pays for itself quickly.
Quotas and plan design
Automated applications have a real per-application cost, so decide early how they fit your pricing. Common patterns are a monthly allowance in a premium tier, a credit pack, or a per-application add-on. Whatever you choose, make the remaining quota visible and show a receipt for every application so the value is tangible.
The integration
The apply request
At its core the integration is one request. Your backend sends the job URL, the structured profile, the resume file and a consent flag. The API responds with an application identifier and begins work. Median submissions complete in a few minutes, longer when a form needs input or an ATS is slow.
Keep the request idempotent on your side. If a user taps twice or a retry fires, you do not want two applications to the same role. Store the application identifier against the job and the user before the request leaves your system.
Handling webhooks
Results arrive by webhook as one of three events: submitted, needs_input, or failed. Submitted includes a screenshot of the confirmation page. Needs_input includes the list of fields the form required and the profile could not answer. Failed includes a reason, such as a closed posting or an ATS error.
Your webhook handler should verify the signature, update the application record, and trigger the right user-facing message. Our article on the job application webhook goes through payloads, retries and ordering in detail.
Designing the needs_input experience
This is where most integrations are won or lost. When a form asks something the profile could not answer, the user sees a short request for the missing fields, answers, and the application resumes. Treat it as a normal step, not an error.
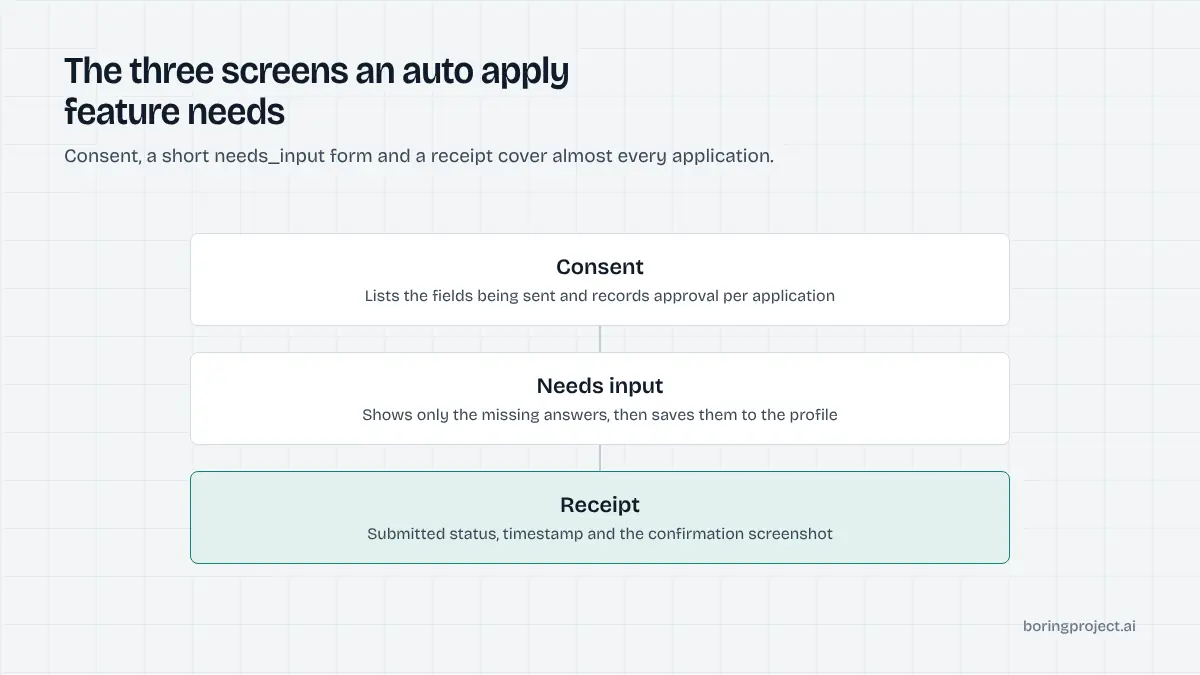
Two details matter. First, write the questions in plain language that mirrors the employer's form, so the user is not guessing. Second, save answers back to the profile when they are reusable, so the same question stops pausing future applications. Never answer on the user's behalf; our guide to screening questions automation explains why guessing is the wrong trade.
Rollout and operations
Launch to a cohort
Start with a small group of engaged users and a curated slice of your job inventory. Watch three numbers: the share of applications that submit without a pause, the share that need input, and the share that fail. Each tells you something different. High needs_input points at profile gaps; high failures usually point at stale job URLs or a specific ATS.
Resist the urge to launch to everyone at once. A cohort of a few hundred users produces enough applications to see patterns by ATS within a week, and it limits the blast radius if a profile field is mapped wrongly.
Receipts and status in the UI
Every application should have a visible state and, once submitted, a receipt with the confirmation screenshot. A simple applications list with status chips does more for retention than any badge or streak, because it turns an invisible process into evidence the user can act on.
| Event | What the user sees | What your backend does |
|---|---|---|
| Submitted | "Applied" with screenshot | Store receipt, update status |
| Needs input | Short form for missing fields | Collect answers, resubmit |
| Failed | Reason and suggested next step | Log reason, offer alternatives |
Guardrails that protect your users
Cap daily applications per user and nudge selection over bulk. Rely on the apply layer's per-employer rate limits so your platform as a whole never floods one company. Make it easy to withdraw consent and cancel queued applications. These guardrails keep employers receptive to applications from your users, which is the asset the whole feature depends on.
Frequently asked questions
What data do we need to send with each apply request?
The job URL, a structured candidate profile (contact details, work history, education, skills, work authorisation and similar standard fields), the resume file, and a consent flag confirming the candidate approved this application. Optional fields such as a cover letter or preferred answers to common screening questions reduce the chance of a needs_input pause.
How should the UI handle a needs_input response?
Show the candidate exactly which fields are missing, in plain language, with inputs sized to the question. Save their answers to the profile where appropriate so the same question does not pause future applications. Then resubmit. Treat it as a short form, not an error state; candidates respond well when they understand it is a normal part of applying.
Do we need webhooks, or can we poll?
Webhooks are strongly preferred. Submissions take minutes and sometimes longer when a form pauses for input, so polling wastes requests and delays the candidate's feedback. A webhook endpoint that receives submitted, needs_input and failed events, verifies the signature and updates the application record is a small amount of code and much more responsive.
Should auto apply be a paid tier?
Many products gate it behind a paid plan or a credit allowance because the underlying cost is per application. Others include a monthly quota in a premium tier. Whatever you choose, make the quota visible, show receipts for every application, and avoid unlimited plans until you have measured per-user volume and the failure rate on your job inventory.
How do we keep candidates from spamming employers?
Enforce limits at two levels. Per candidate, cap daily applications and encourage selection over bulk. Per employer, rely on the apply layer's rate limits, which operate across all your users so no single company is flooded. Surface relevance signals in your UI so the default behaviour is to apply to plausible matches rather than everything in a feed.
How long does rollout usually take?
Teams that add auto apply to job search app products usually find the code is the quick part: a consent screen, an apply call, a webhook handler and a receipt view is a short engineering effort for a team that already has a candidate profile and a job feed. Most of the calendar time goes into profile completeness and the needs_input experience. Launch to a small cohort first and expand once failure rates are understood.
Next step
If you are ready to add auto apply to job search app products, the Apply API gives you the request, the three-state webhook and the screenshot receipt described here, with per-application pricing. Start with the API documentation and ship your first cohort.